Table of Contents
Introduction
The Java Development Kit (JDK) is software used for Java programming, along with the Java Virtual Machine (JVM) and the Java Runtime Environment (JRE). In this blog post, we will provide you with a step-by-step guide on how to install Java on Windows.
In this blog, We will learn to install the Java (JDK) on Windows.
Prerequisites
- A system running Windows 7 or Above.
- Internet connection.
- Administrator privileges on system.
Step 1: Verify if Java already installed in the system
Check if Java is already installed in your system. To verify open CMD as administrator and run the following commands :
java -versionIf Java is already installed in the system, You may see output like below :

Else if Java is not installed in your system, You may see output like below :

Step 2: Download Java for Windows
Download the latest Java (JDK) installation file for Windows to have the latest features and bug fixes.
- Open your favorite web browser and navigate to the official Oracle Java downloads page.
- On the Downloads page, Click the x64 Installer download link under the Windows category. In this case we are installing latest Java long-term support version 17 edition but you can install as per your requirements.
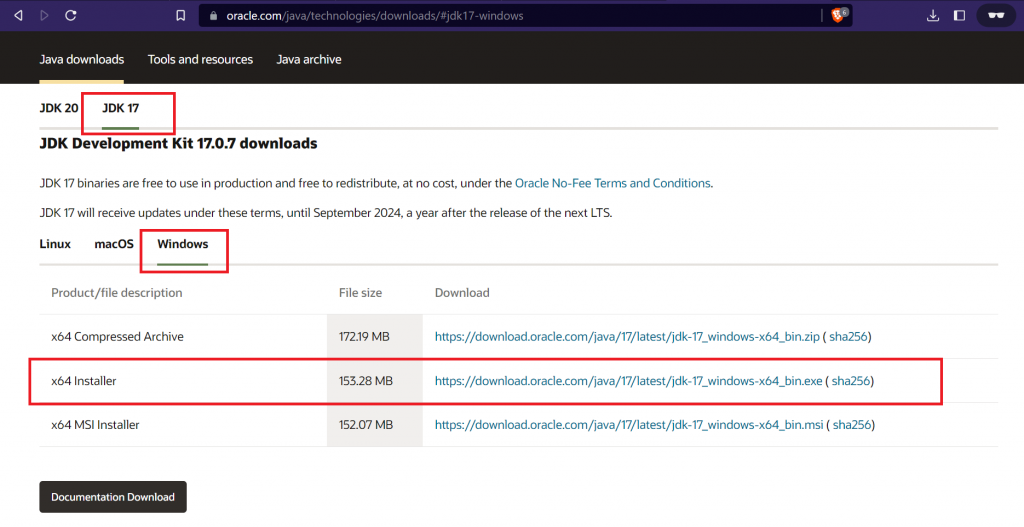
Once the download is completed, We can proceed with the installation of Java
Step 3: Install Java on Windows
Follow the steps below:
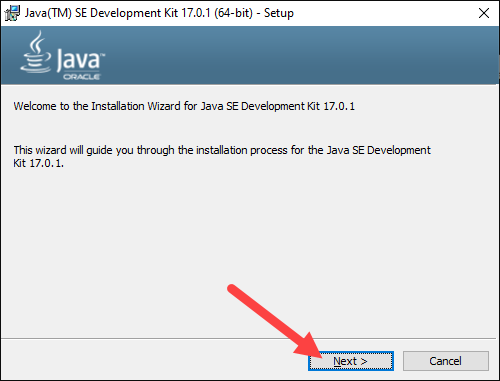
- Double click or run the installation file.
- Now installation wizard will appear. Click on Next
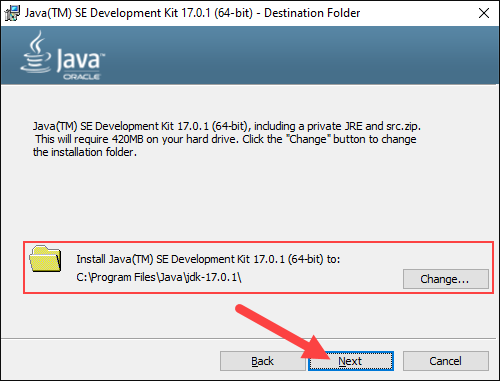
- You can choose your destination folder for the Java installation or leave it to the default path. Click Next to proceed.
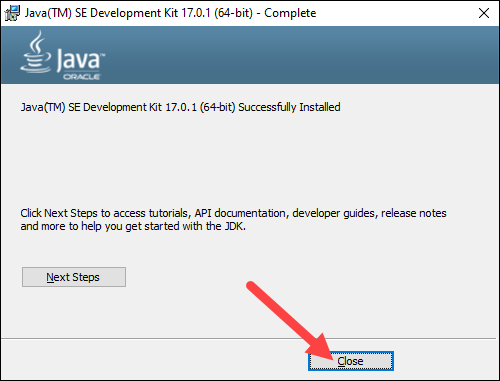
- Now Installation will start. Wait for the wizard to complete the installation process until the Successfully Installed message appears. Click Close to exit the wizard.
Step 4: Set Environmental Variables in Windows Path
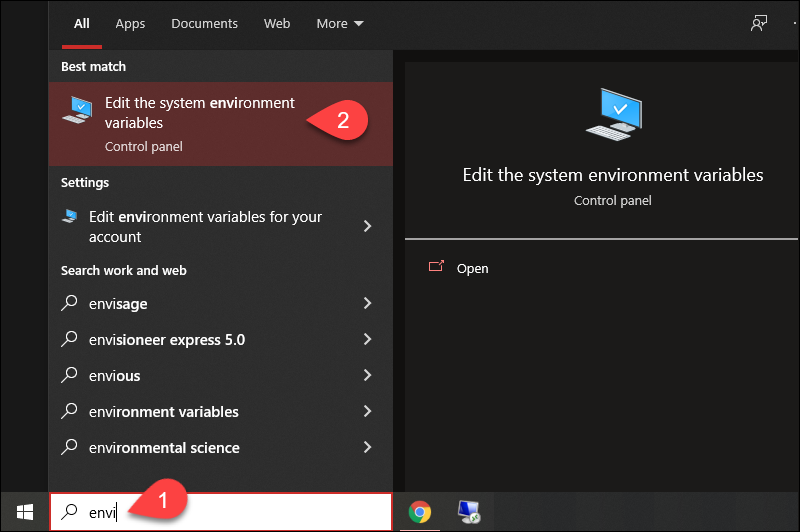
- If you are using Windows 10 then open the Start menu and search for environment variables.
- Select the Edit the system environment variables result.
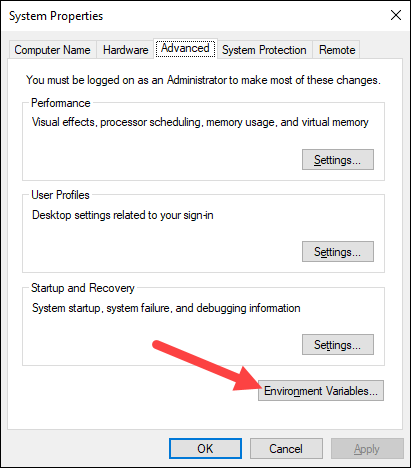
- In the System Properties window, under the Advanced tab, click Environment Variables…
- In Environment Variables window, select Path in System variables and click on Edit as shown below:
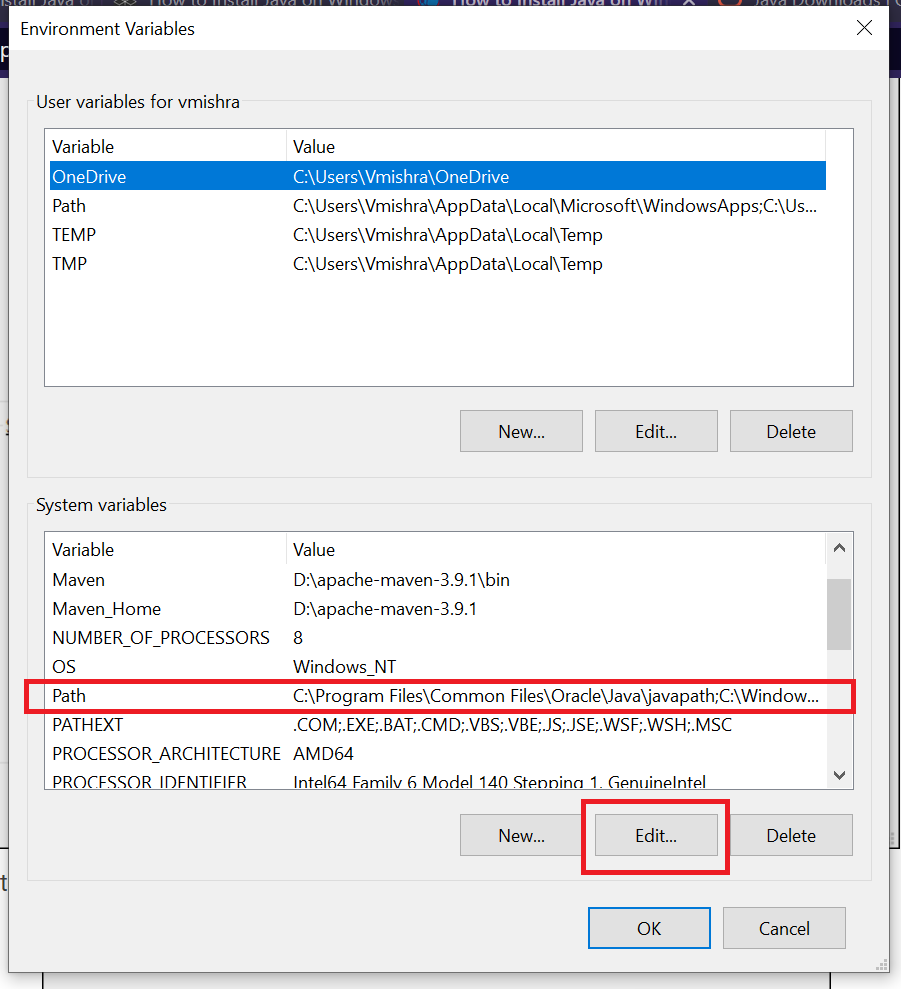
- Note : The default path is usually C:\Program Files\Java\jdk-17.0.1\bin.
- Now, Copy JDK bin path where Java has been installed and paste the path at last as shown in below image and click on Ok :
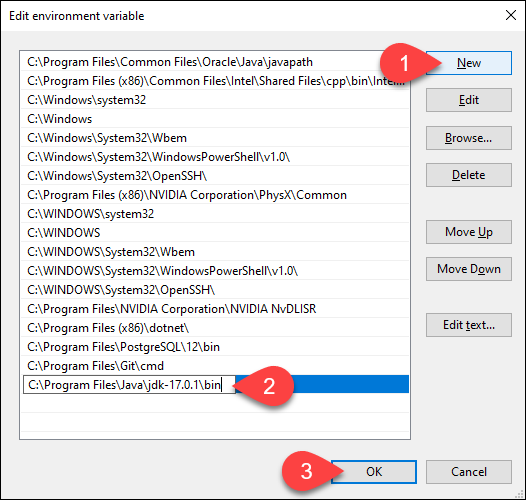
- Click OK to save the changes and exit the variable editing window.
Step 5: Add JAVA_HOME Variable
- In the Environment Variables window, under the System variables category, click the New… button to create a new variable.
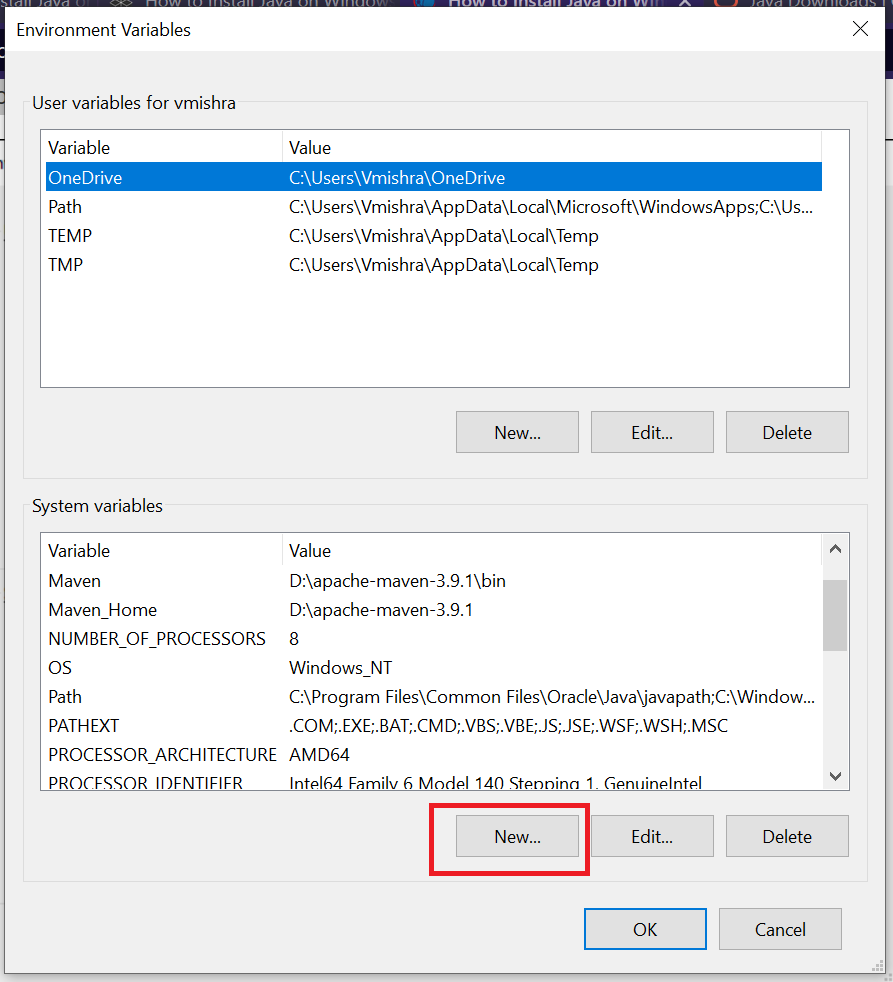
- In Edit System Variable tab fill the details as Variable name: JAVA_HOME and Variable value: “jdk Path” as shown in below image :

- Confirm the changes by clicking OK in the Environment Variables and System properties windows.
- Java setup is done, If you want you can restart your system once or continue without restart.
Step 6: Verify Java installation in the system
Open CMD as administrator and run the java -version command :
java -versionIf Java is successfully installed in the system, You may see output like below :

In this case if you are not getting output like above image then restart your system and repeat Step 6.
Conclusion
In this blog we showed how to install the Java (JDK) on a Windows system. Now you can run your Java code in your machine as per your requirements. If you are looking to install on other operating systems like Linux or MAC then you can read this blog.


You have a real gift for breaking down complex ideas into digestible pieces. Fantastic job!
Thank you for investing your time and effort in creating such a valuable resource.
I’ve bookmarked this as a go-to resource—it’s that good!
This post has answered questions I didn’t even know I had. Exceptional work!
Your writing not only informs but also motivates. I’m excited to apply what I’ve learned.
This blog has truly inspired me to dig deeper into [specific topic]. Thank you!
I especially loved how you broke down the complex errors. It’s rare to find such clarity.
The code snippets and their explanations are spot on—thank you for sharing!
Your use of diagrams and examples made this complex subject much easier to grasp.
The way you explained the steps ti implement was incredibly intuitive. It really clicked for me!
What a phenomenal read! You’ve packed so much knowledge into this article.
Every sentence adds value. This is what great technical writing looks like!
This blog is like a masterclass on the topic—thorough and insightful.
You’ve set a new standard for technical blogs with this post. Outstanding work!
I’m blown away by how well-structured and informative this blog is. Kudos!
Absolutely brilliant post! You’ve explained complex concepts in such a relatable way.
This blog is a goldmine of technical insights! The depth of analysis and clarity in explanation are unmatched.
You’ve sparked a great discussion here.
This made my deployment process smoother.
This is gold. Bookmarking for future reference!
Perfect for onboarding new team members.
This is a textbook example of clean code.
A must-read for anyone in the field.
Loved how you explored both pros and cons.
Impressive how you handled the edge cases here.