Table of Contents
- 1 Introduction
- 2 Prerequisites
- 3 Step 1: Upgrade your system to latest version
- 4 Step 2: Verify if Java already installed in the system
- 5 Step 3: Install Java on Ubuntu using apt
- 6 Step 4: Install PostgreSQL on Ubuntu
- 7 Step 5: Download and Install SonarQube
- 8 Step 6: Add SonarQube Group and User
- 9 Step 7: Configure SonarQube
Introduction
SonarQube is a popular open-source platform for continuous inspection of code quality, code analysis, and code coverage reporting which performs reviews of code to detect bugs, code smells and vulnerability issues of programming languages such as Java, C#, PHP, JavaScript and more. In this blog, We will explain how to download and install SonarQube on Ubuntu.
Prerequisites
Before we start the installation, ensure that your Ubuntu system meets the following requirements :
- A Running Ubuntu Server
- SSH access with sudo Privileges
- Java 11 or higher version
- Minimum 2GB RAM and 1 CPU.
- Web Browser to Access SonarQube Web Interface
Step 1: Upgrade your system to latest version
Before you begin the installation process, it’s a good idea to update your system’s package list and upgrade any existing packages to their latest versions. Open a terminal and run the following commands :
sudo apt updatesudo apt upgrade -yOnce the system upgrade process completed, We will check whether Java is already installed in the system.
Step 2: Verify if Java already installed in the system
To check Java, Run the following commands :
java -versionIf Java is already installed, You will get below like output with Java version details :

Else if Java is not installed in your system you will get below like output :

I am considering you don’t have Java installed. If you have already installed Java then you can skip Step 3.
Step 3: Install Java on Ubuntu using apt
You can install required versions of OpenJDK using following commands :
In this case we are installing JDK – 17 but to install specific version of Java replace “17” with your version and run the following command :
sudo apt install openjdk-17-jre-headlessTo check all the version of Java available to install visit official Java release page.
After successful installation we need to verify the Java installation and it’s version. To do that we can run Step-2 command or run below command :
java -versionIf Java successfully installed than we should see the output as shown below with Java version details :

Step 4: Install PostgreSQL on Ubuntu
Sonarqube has embedded H2 database by default. It is recommended for tests but not for production use. Supported databases by SonarQube are Oracle, PostgreSQL, and Microsoft SQLServer.
Here we will install and configure PostgreSQL for SonarQube.
- Install ca-certificate to the server using following code :
sudo apt install wget ca-certificatesYou may see output like below :

- Install wget package and unzip on server using following code :
sudo apt-get install wget unzip -y- Create the file repository configuration using following code :
sudo sh -c 'echo "deb http://apt.postgresql.org/pub/repos/apt $(lsb_release -cs)-pgdg main" > /etc/apt/sources.list.d/pgdg.list'- Import the repository signing key using following code :
wget --quiet -O - https://www.postgresql.org/media/keys/ACCC4CF8.asc | sudo apt-key add -You may see Output like below :

- Update the package lists :
sudo apt-get updateThis will update all the package list to the latest version. You may see output like below :

- Install the latest version of PostgreSQL using following code.
sudo apt-get -y install postgresqlIf you want a specific version, use ‘postgresql-12’ or similar instead of ‘postgresql’ :
- Enable the database server to start automatically on reboot.
sudo systemctl enable postgresql- Start the database server using systemctl.
sudo systemctl start postgresql- Verify the Postgres version using following code :
psql -versionYou may see the output as below :

- Change the default PostgreSQL password.
sudo passwd postgresAfter running above code you may see Output like below :

Enter your preferred password with confirmation and hit Enter.
- Switch to the Postgres User using following code :
su - postgresOutput for this code may look as below :

It will ask for the Password for User which you have set in above step, Enter your password and hit ENTER.
- Create a user named sonar :
createuser sonar- Log in to PostgreSQL.
psql- Set a password for the sonar user. Use your preferred password in place of ‘your-password‘.
ALTER USER sonar WITH ENCRYPTED password 'your-password';You may see output as below :

- Create a database named as sonarqube and set sonar as owner.
CREATE DATABASE sonarqube OWNER sonar;You may Output as below :

- Grant all the privileges on the sonarqube database to the sonar User.
GRANT ALL PRIVILEGES ON DATABASE sonarqube to sonar;You may see the output as below :

- Now exit PostgreSQL.
\q- Return to your non-root sudo user account.
exitYou may see output as below :

Step 5: Download and Install SonarQube
- We need to Install the zip utility, which is needed to unzip the SonarQube files.
sudo apt-get install zip -yDownload the SonarQube distribution files.
Note : Go to official SonarQube download page and download Setpup to see latest version details.
See the complete version of current SonarQube, At the time of writing this blog latest SonarQube version is sonarqube-10.0.0.68432
- Download the latest SonarQube package using following command :
sudo wget https://binaries.sonarsource.com/Distribution/sonarqube/sonarqube-10.0.0.68432.zipIn above code replace the version number including all numbers with your SonarQube latest version.
- Now Unzip the downloaded file using following code :
sudo unzip sonarqube-<VERSION_NUMBER>.zipIn this case we have SonarQube version -10.0.0.68432, So it will look like below code :
sudo unzip sonarqube-10.0.0.68432.zip- Move the unzipped files to /opt/sonarqube directory using following command :
sudo mv sonarqube-<VERSION_NUMBER> /opt/sonarqubeIn this case we have SonarQube version -10.0.0.68432, So it will look like below code :
sudo mv sonarqube-10.0.0.68432 /opt/sonarqubeStep 6: Add SonarQube Group and User
- Create a group named as sonar.
sudo groupadd sonar- Create a User named as sonar and set /opt/sonarqube as the home directory using following command :
sudo useradd -c "user to run SonarQube" -d /opt/sonarqube -g sonar sonar- Grant access to the sonar User for /opt/sonarqube directory using following command :
sudo chown sonar:sonar /opt/sonarqube -RStep 7: Configure SonarQube
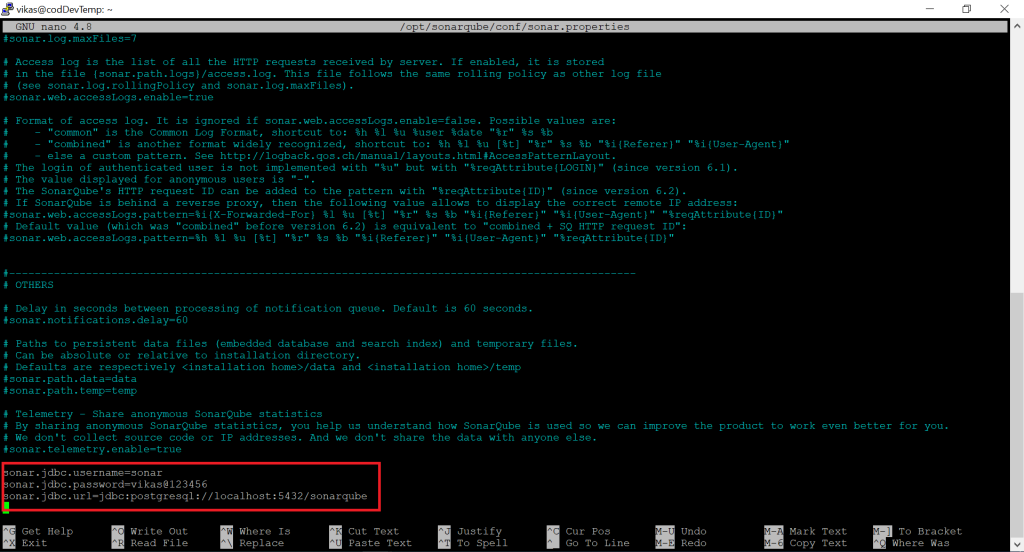
- We need to make some configuration changes to sonar.properties file of SonarQube so to open and edit the sonar.properties file run the following command :
sudo nano /opt/sonarqube/conf/sonar.propertiesYou may see output like below :

Now you have to find the following lines in this file
#sonar.jdbc.username=
#sonar.jdbc.password=
#sonar.jdbc.url=jdbc:postgresql://localhost:5432/sonarqube
Once you found it, Uncomment the lines, and add the database Username and Password which you have created in Step 4.
Or
You can directly paste the below lines at end of the file and save and exit the file.
sonar.jdbc.username=sonar
sonar.jdbc.password=enter_password
sonar.jdbc.url=jdbc:postgresql://localhost:5432/sonarqube
Here you need to replace enter_password with your password which you have set earlier.
Now Save and exit the file.
Now we need to edit the sonar script file using following code :
sudo nano /opt/sonarqube/bin/linux-x86-64/sonar.shFind this below line in sonar.sh file and Uncomment the line and change it as below :
RUN_AS_USER=sonarOr
If you are unable to find it, Directly paste above line in start or end of the file.
Save and exit the file.
Create a systemd service file to start SonarQube at system boot.
- To create new systemd service file run following command :
sudo nano /etc/systemd/system/sonar.service- Once file is opened, Paste the following lines to the file.
[Unit]
Description=SonarQube service
After=syslog.target network.target

[Service]
Type=forking
ExecStart=/opt/sonarqube/bin/linux-x86-64/sonar.sh start
ExecStop=/opt/sonarqube/bin/linux-x86-64/sonar.sh stop
LimitNOFILE=65536
LimitNPROC=4096
User=sonar
Group=sonar
Restart=always

LimitNOFILE=65536
LimitNPROC=4096

[Install]
WantedBy=multi-user.target
Save and exit the file.
Step 8: Start SonarQube Server
- First reload the server using following command :
sudo systemctl daemon-reload- Enable the SonarQube service to run at system startup.
sudo systemctl enable sonar- Start the SonarQube service.
sudo systemctl start sonar- Check Sonarqube Status
sudo systemctl status sonar- Now allow Port 9000 in Linux firewall
sudo ufw allow 9000/tcpStep 9: Modify Kernel System Limits
We need to add some configuration in sysctl configuration file.
To edit sysctl.conf run the following command :
sudo nano /etc/sysctl.confOnce file is opened, Add the following lines at end of the file.
vm.max_map_count=262144
fs.file-max=65536
ulimit -n 65536
ulimit -u 4096
Save and Exit the file.
Reboot the system to apply the changes.
- Run following command to reboot the server.
sudo rebootNote : If you are setting up Jenkins on Linux VM on any cloud platform, You need to enable port 9000 in networking inbound port rule.
Step 10: Access SonarQube Web Interface
Open your favorite web browser, and navigate to your server’ IP address. Use the following syntax :
http://server-ip:9000
If you are running SonarQube on local machine then use following syntax :
http://localhost:9000
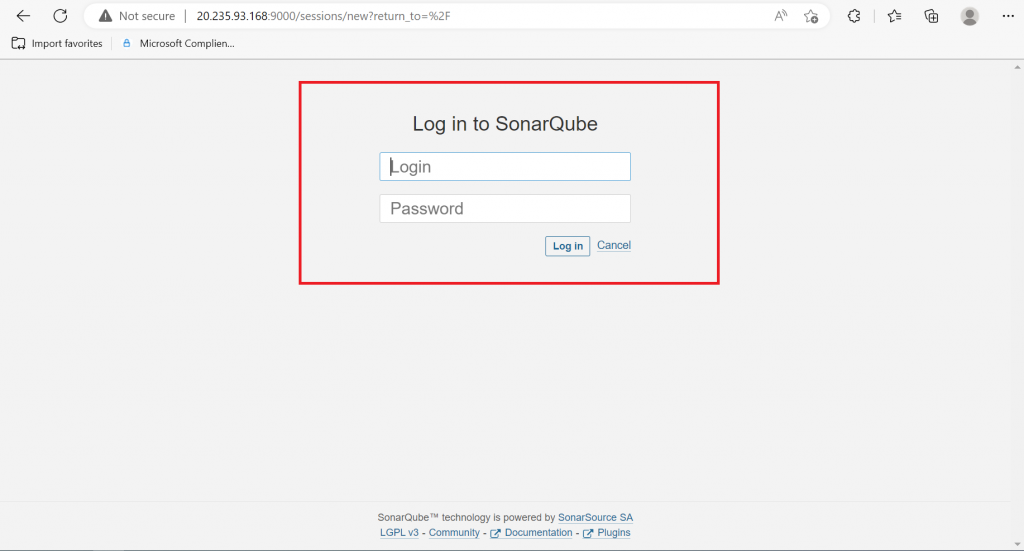
Now SonarQube will start in your web browser and will look like below snap :

Login to SonarQube with default Administrator Username and Password is admin.
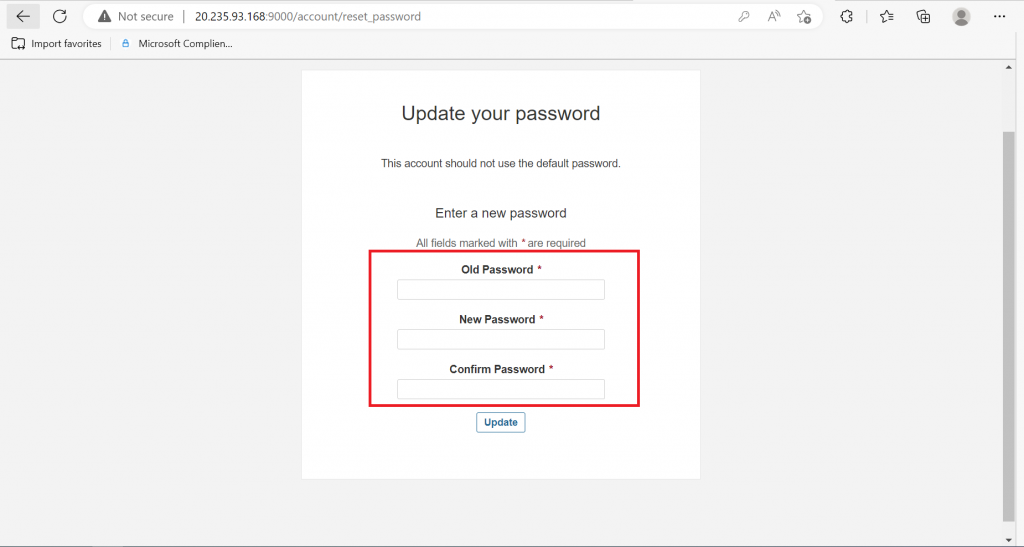
SonarQube will prompt you to change your password.

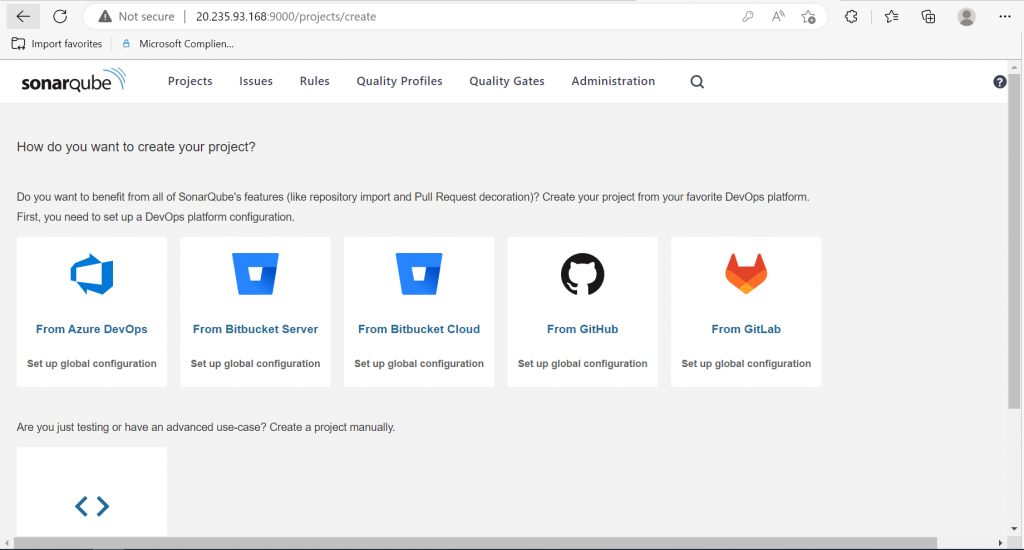
Once you changed your password, You will be able to see the SonarQube Dashboard as shown below :

Congratulations! You have successfully installed and configured SonarQube on Ubuntu. You can now use it to analyze and improve the quality of your code.
If you face any difficulty or error by following these steps, Please write it down in comment section.


I’ve read many blogs on this subject, but yours stands out for its depth and clarity.
I’ll be referencing this in my next team meeting.
This filled a major gap in my understanding.
Love how you made this so approachable.
One of the best posts I’ve read this month.
Nice application of OOP concepts!
Love how you used recursion here.
I hadn’t considered this angle before—interesting!
You’ve clearly done your research. Respect!