Table of Contents
Introduction
Jenkins is a CI/CD software platform that supports continuous integration (CI) and continuous delivery (CD). It is one of the most popular and widely used automation servers in the world, with thousands of users and contributors around the globe.
Jenkins is a cross-platform tool, which means it can run on almost any operating system, including Windows, Linux, and macOS.
Prerequisites
Minimum hardware requirements:
- 256 MB of RAM
- 1 GB of drive space (although 10 GB is a recommended minimum if running Jenkins as a Docker container)
Recommended hardware configuration for a small team:
- 4 GB+ of RAM
- 50 GB+ of drive space
Software requirements:
- Running Ubuntu server
- A user account with administrator privileges.
- Access to a terminal window / command line.
- A web browser to access the Jenkins web interface.
- JDK , Read How to Install JDK
Step 1: Upgrade your system to latest version
Before you begin the installation process, it’s a good idea to update your system’s package list and upgrade any existing packages to their latest versions. Open a terminal and run the following commands :
sudo apt updatesudo apt upgrade -yStep 2: Verify if Java already installed in the system
To check Java, Run the following commands :
java -versionIf Java is already installed, You will get below like output with Java version details :

Else if Java is not installed in your system you will get below like output :

If you need help with JDK installation, Read How to Install JDK on Ubuntu
I am assuming you have JDK installed, Now we will proceed with the Jenkins installation.
Step 3: Install Jenkins
It is recommended to install Jenkins using the project-maintained repository, rather than from the default Ubuntu repository. The reason for that is because the version of Jenkins included with the default Ubuntu packages is often behind the latest available version from the project itself. To ensure you have the latest fixes and features, use the project-maintained packages to install Jenkins.
Once Java is installed, we can proceed with the installation of Jenkins. To install Jenkins on Ubuntu, follow these steps:
- Add the Jenkins repository key to your system :
curl -fsSL https://pkg.jenkins.io/debian-stable/jenkins.io-2023.key | sudo tee \
/usr/share/keyrings/jenkins-keyring.asc > /dev/null- Add the Jenkins software repository to the source list and provide the authentication key :
echo deb [signed-by=/usr/share/keyrings/jenkins-keyring.asc] \
  https://pkg.jenkins.io/debian-stable binary/ | sudo tee \
  /etc/apt/sources.list.d/jenkins.list > /dev/null
This command adds the Long Term Support (LTS) stable release to the sources list, and there may be output as Ok.
Now update the system repository one more time. Updating refreshes the cache and makes the system aware of the new Jenkins repository.
sudo apt updatesudo apt upgrade -yIt is recommended to install previous version of Jenkins because latest version might have some bug or functionality issue, But it’s totally depends on your requirements.
To Install latest version of Jenkins run below code :
sudo apt-get install jenkins -yTo Install specific version of Jenkins run below code :
Replace the version “2.440.3” with your required version. See all the stable release of Jenkins – Jenkins LTS Versions
sudo apt-get install jenkins=2.440.3 -yAfter running this command Jenkins will start downloading and installing in the system. Wait for the download and installation to complete.
After installation process is completed then we will enable the Jenkins by running below command :
sudo systemctl enable jenkinsNow let’s start Jenkins by running below command :
sudo systemctl start jenkinsNow Jenkins must be started. To verify that run below command :
sudo systemctl status jenkinsWe will get output like below snap :

Step 4: Modify Firewall to Allow Jenkins
Allow Jenkins to communicate by setting up the default port 8080 UFW firewall.
We will check status of UFW firewall by running below command :
sudo ufw statusIf you haven’t configured the UFW firewall yet, it displays as inactive. Enable UFW by running below command :
sudo ufw enableNow Open port 8080 by running the following commands:
sudo ufw allow 8080Note : If you are setting up Jenkins on Linux VM on any cloud platform, You need to enable port 8080 in networking inbound port rule.
Refer complete blog on Install Jenkins on Linux Virtual Machine.
Step 5: Set up Jenkins Web Interface
- Open your favorite web browser, and navigate to your server’ IP address. Use the following syntax :
http://server-ip:8080
- If you are running Jenkins on local machine then use following syntax :
http://localhost:8080
- Now Jenkins will start in your web browser and will look like below snap :
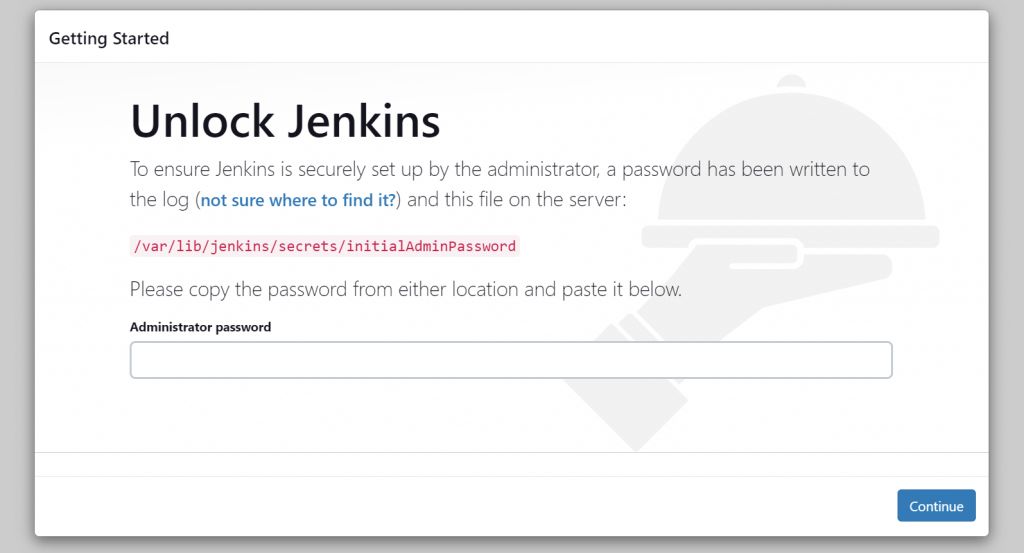
To proceed further we need to unlock Jenkins by providing Administrator password.
- Copy the path which is displayed on Jenkins window like above snapshot and obtain the default Jenkins unlock password by running the following command :
sudo cat /var/lib/jenkins/secrets/initialAdminPasswordYou should see the output like below snapshot :

The system returns an alphanumeric code like above shown image. Copy that code and enter in the Administrator password field and click Continue.
The next window prompts to either Install suggested plugins or Select plugins to install. It’s fine to simply install the suggested plugins.
Click on Install suggested plugins
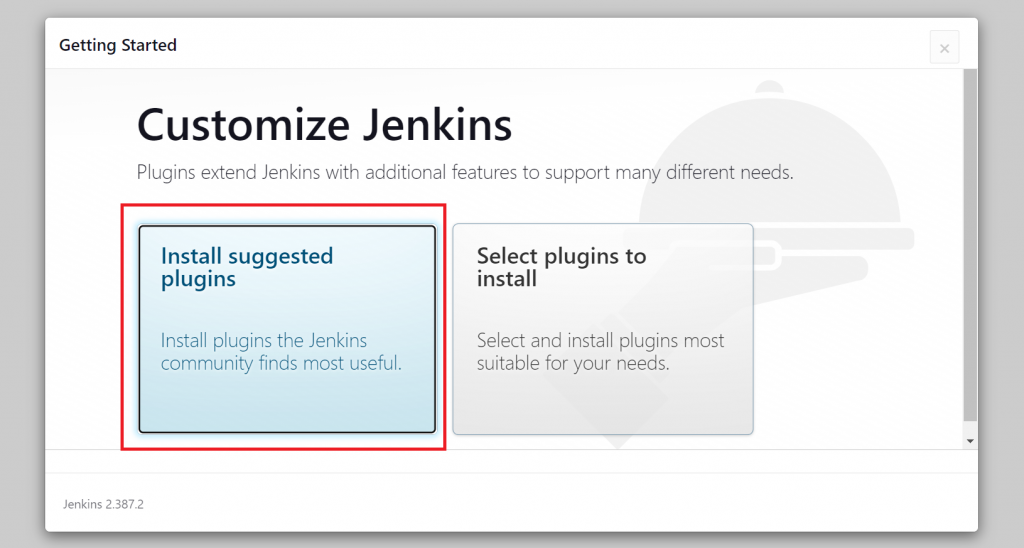
We can install more plugins later at anytime. First time Jenkins will install all the default plugins.
Now you may see next screen like below snapshot :
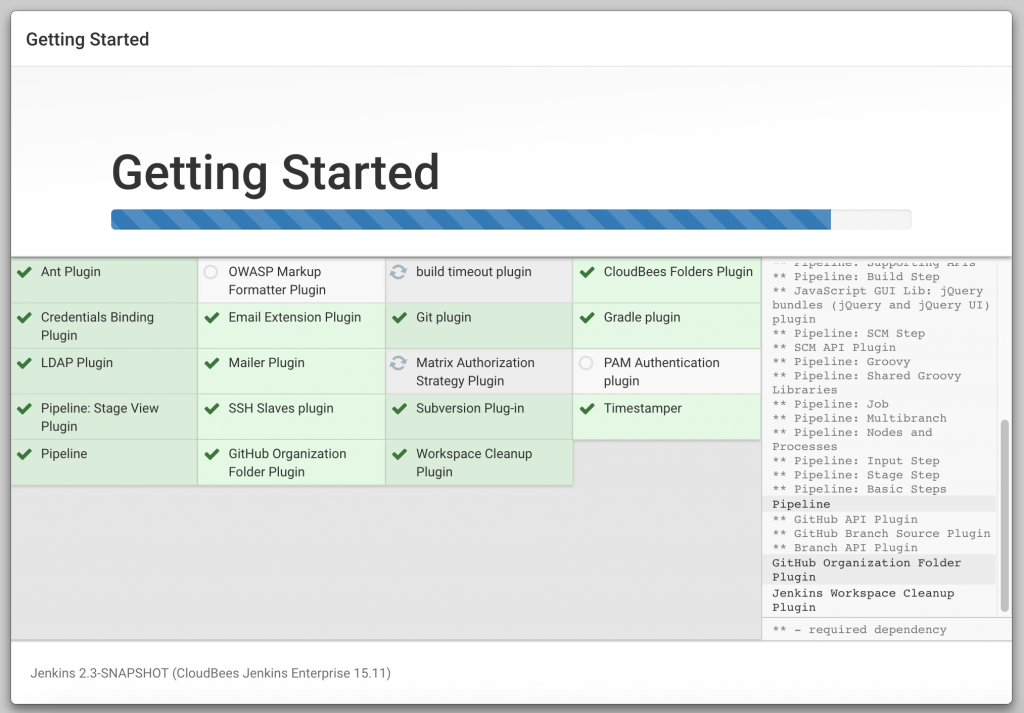
After all default plugins are installed then you may see next screen as below snap to enter admin user details :
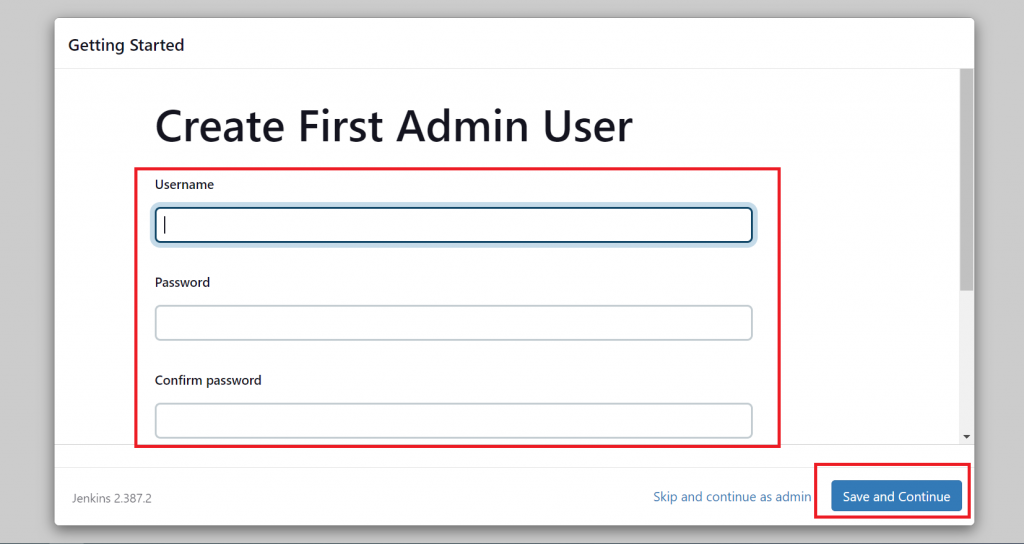
Enter your required details and click on Save and Continue.
Note : Remember your Username and Password or note it down somewhere.
Once all the admin user details accepted then you should see the Instance Configuration. This is the preferred network address for this Jenkins installation. Verify the address you want to use for your server. This is most likely the same address you used to get to this configuration page.
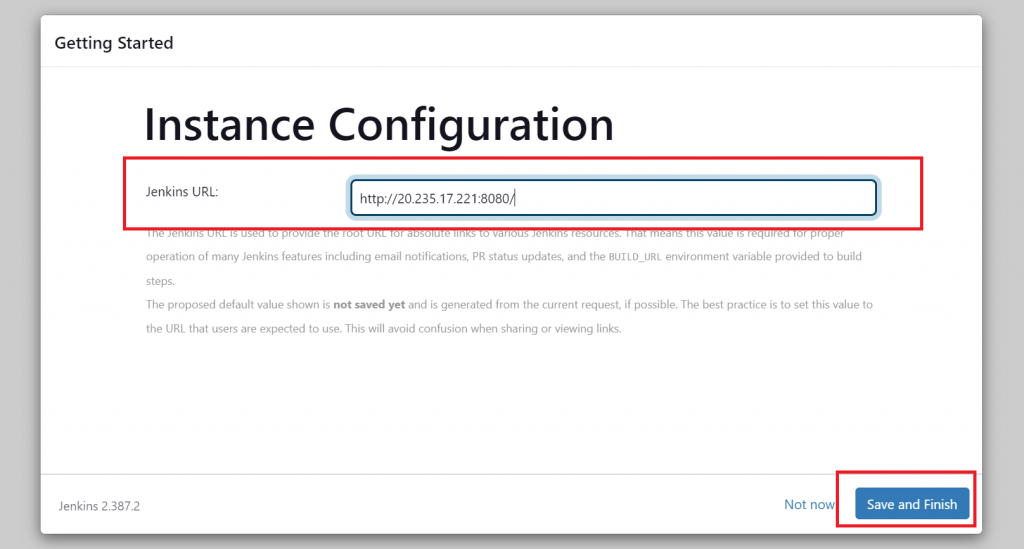
Once you have verified URL then click on Save and Finish. Now you can see the Ready Jenkins window as shown below :
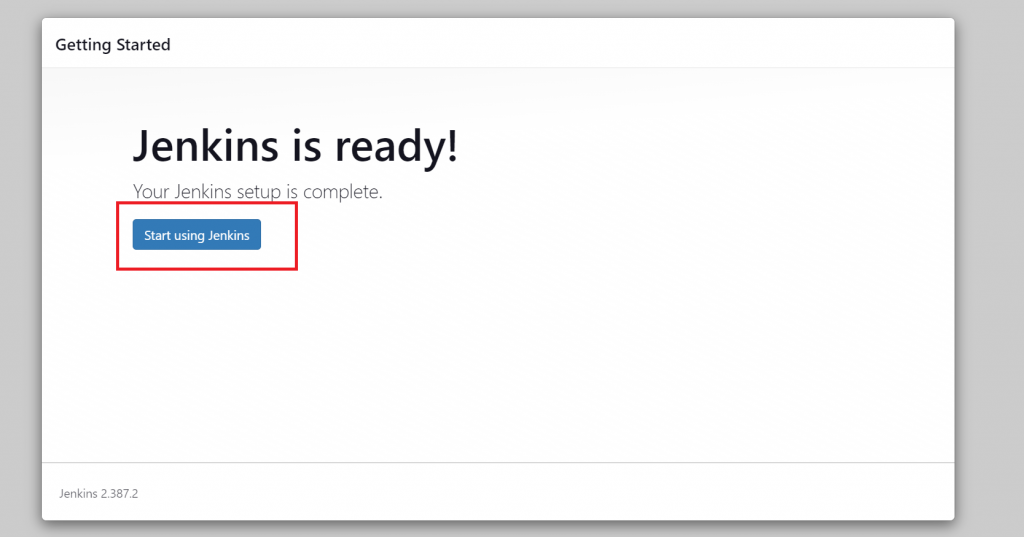
Now We have successfully configured Jenkins. Next window will be Dashboard of Jenkins from where we can orchestrate our projects as shown in below snapshot :
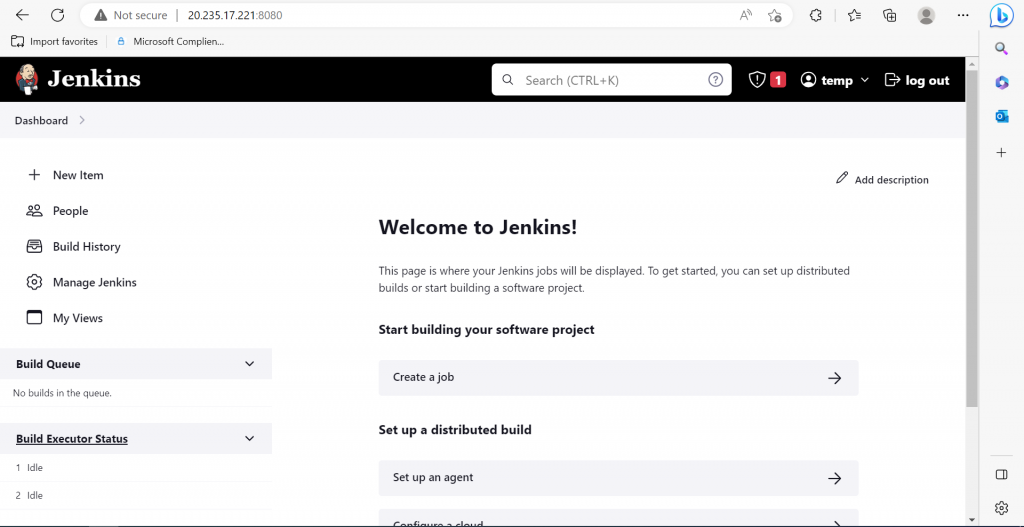
Woohoo !!.. We have successfully installed Jenkins on Ubuntu.
Conclusion
In this blog post, We’ve shown you how to install Jenkins on Ubuntu. By following these simple steps, you should be able to get Jenkins up and running on your Ubuntu system in no time. With Jenkins, you can automate your software development process and streamline your workflow, saving you time and effort in the long run.
If you face any difficulty or error by following these steps, Please write it down in comment section.


I was not able to install jenkins from last two weeks, each time i used to get the different error. Thanks for this blog, it helped to me run jenkins smoothly.
Your passion for the subject shines through in every word. Inspiring and informative!
Best blog for Nexus
You’ve tackled a challenging topic and made it accessible to everyone. Exceptional clarity!
This article is a perfect blend of technical depth and practical examples. Well done!
Love how you’re building in public.
This is going into my study notes.
This is going straight into my production pipeline.
The use of functional programming here is elegant.
You’ve inspired me to write more technical posts.
Really admire your communication style.
Thank you for putting this together.
Thoughtful and well-argued.
I appreciate the nuance in your perspective.
So many practical takeaways here.
This saved me hours—thank you!
Solid reasoning behind each step—very logical.
Very well-structured explanation.
I appreciate how clearly you explained this.