Table of Contents
- 1 Introduction
- 2 Prerequisites
- 3 Step 1: Upgrade your system to latest version
- 4 Step 2: Verify if Java already installed in the system
- 5 Step 3: Download Nexus Repository package on Ubuntu
- 6 Step 4: Configure Nexus Repository on Ubuntu
- 7 Step 5: Start Nexus Service
- 8 Step 6: Access Nexus Repository Web Interface
- 9 Conclusion
Introduction
Nexus Repository Manager is a powerful tool for managing software artifacts, including Java-based components, Docker containers, and more. It provides a centralized location for storing, sharing, and distributing these artifacts, making it easy for developers and DevOps teams to collaborate and streamline their workflows.
Artifacts in DevOps : In Devops, When we build project we export software build files which may consist of the project source code, dependencies, binaries or resources, and could be represented in different layout depending on the technology. Using CI/CD build tools we bind all the project source code and export single file like WAR, Jar or NuGet etc. which is known as artifact. These artifacts further used in deployment phase we deploy these artifacts on our production / pre-production server.
In this blog post, We will walk through the steps for installing Nexus Repository Manager on Ubuntu.
Prerequisites
- Pre Installed OpenJDK-8
- Minimum 4 CPU’s Required
- Ubuntu Server with User sudo Privileges.
- Any Web Browser
- Firewall/Inbound port: 22, 8081
Step 1: Upgrade your system to latest version
Before you begin the installation process, it’s a good idea to update your system’s package list and upgrade any existing packages to their latest versions. Open a terminal and run the following commands :
sudo apt updatesudo apt upgrade -yOnce the system upgrade process completed, We will check whether Java is already installed in the system.
Step 2: Verify if Java already installed in the system
To check Java, Run the following commands :
java -versionIf Java is already installed, You will get below like output with Java version details :

Else if Java is not installed in your system you will get below like output :

If you need help with JDK installation, Read How to Install JDK on Ubuntu
Note : To install Nexus Repository successfully, We recommend to install OpenJDK – 8.
I am assuming you have JDK installed, Now we will proceed with the Nexus installation.
Step 3: Download Nexus Repository package on Ubuntu
- Change directory and Navigate to /opt directory
cd /opt- Download Nexus Repository package on Ubuntu using wget
sudo wget https://download.sonatype.com/nexus/3/latest-unix.tar.gzThis code will download latest Nexus 3 package and the Output may be as shown below :

Step 4: Configure Nexus Repository on Ubuntu
- Extract the Nexus repository setup in /opt directory using following command :
sudo tar -zxvf latest-unix.tar.gzOnce you extract the Nexus zip file, You may see the output as below. Now we need to move the all content from extracted folder to nexus folder.
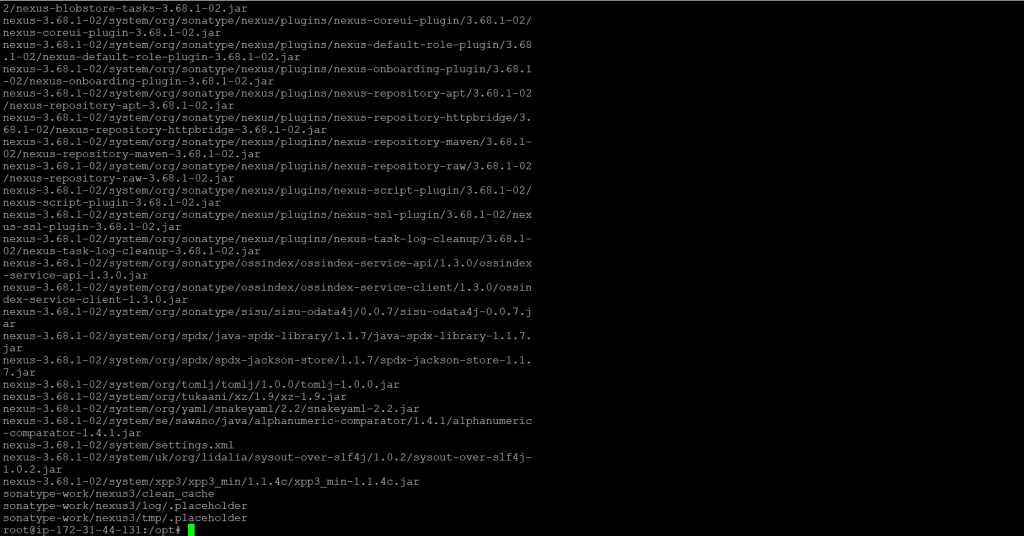
- Replace the nexus-3.52.0-01 from latest nexus version which can be seen in output window. Now rename the extracted Nexus setup folder to nexus.
In this case it will be nexus-3.68.1-02.
sudo mv /opt/nexus-3.52.0-01 /opt/nexusHere replace nexus-3.52.0-01 with your version.
Let’s add a User specially to run Nexus Service because It is not recommended to run nexus service using root user.
We will create user named as nexus and set password for the user as per your choice.
sudo adduser nexusPress Enter twice if asked, You may see output as below
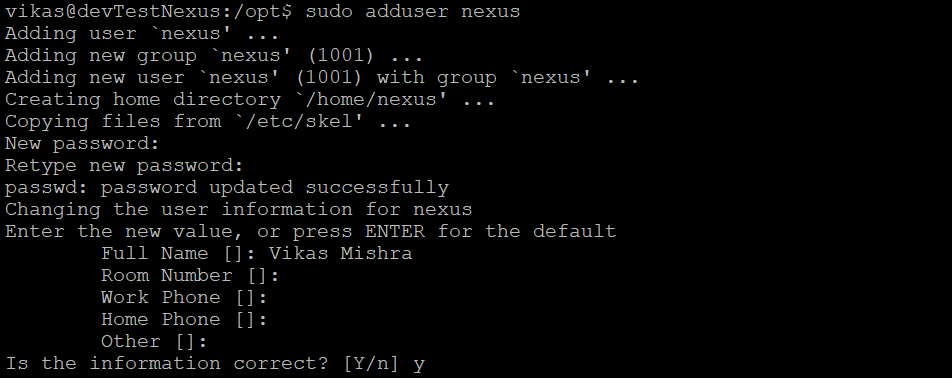
To set no password for nexus user, Open the visudo file in ubuntu
sudo nano visudoAdd below line into it, save and exit. To save changes in nano editor press CTRL + X and then Enter.
nexus ALL=(ALL) NOPASSWD: ALLGive read/write permission to nexus files and nexus directory to nexus user using following code
sudo chown -R nexus:nexus /opt/nexussudo chown -R nexus:nexus /opt/sonatype-workTo run nexus as service at boot time, Open /opt/nexus/bin/nexus.rc file
sudo nano /opt/nexus/bin/nexus.rcUncomment below line or directly add in the file.
run_as_user="nexus"
We will increase the nexus JVM heap size to work nexus service smoothly. To change the size open nexus.vmoptions file using following code :
sudo nano /opt/nexus/bin/nexus.vmoptionsNote : If size is already same or bigger as below configuration, Skip this step
Now copy and paste below configuration in nexus.vmoptions file
-Xms1024m
-Xmx1024m
-XX:MaxDirectMemorySize=1024m
-XX:LogFile=./sonatype-work/nexus3/log/jvm.log
-XX:-OmitStackTraceInFastThrow
-Djava.net.preferIPv4Stack=true
-Dkaraf.home=.
-Dkaraf.base=.
-Dkaraf.etc=etc/karaf
-Djava.util.logging.config.file=/etc/karaf/java.util.logging.properties
-Dkaraf.data=./sonatype-work/nexus3
-Dkaraf.log=./sonatype-work/nexus3/log
-Djava.io.tmpdir=./sonatype-work/nexus3/tmp
To run Nexus as a service using systemd open nexus.service file by following code :
sudo nano /etc/systemd/system/nexus.serviceNow copy and paste below line in nexus.service file
[Unit]
Description=nexus service
After=network.target
[Service]
Type=forking
LimitNOFILE=65536
ExecStart=/opt/nexus/bin/nexus start
ExecStop=/opt/nexus/bin/nexus stop
User=nexus
Restart=on-abort
[Install]
WantedBy=multi-user.target
Note : Here nexus is the user.
Save and exit the file using CTRL + X and then Enter.
If you are running UFW firewall on Ubuntu, open the firewall Port 8081 using below command :
sudo ufw allow 8081/tcpStep 5: Start Nexus Service
Initialize the systemctl service
sudo systemctl daemon-reloadStart Nexus Service using systemctl run following command
sudo systemctl start nexusEnable Nexus Service at system startup, Run following command :
sudo systemctl enable nexusTo check Nexus Service status run following command :
sudo systemctl status nexusYou may see output like below :

If nexus service is not started, You can check the nexus logs using below command :
sudo tail -f /opt/sonatype-work/nexus3/log/nexus.logNote : If you are installing Nexus on Linux VM on any cloud then You need to enable port 8081 in networking inbound port rule.
Step 6: Access Nexus Repository Web Interface
To access Nexus repository web interface , Open your favorite browser
Now To access Nexus repository web interface use following URL syntax :
http://server_IP:8081Here replace server_IP with your server IP or If you are using on local machine, Open below URL :
http://localhost:8081Now you will be able to see Nexus web interface in your browser as below :
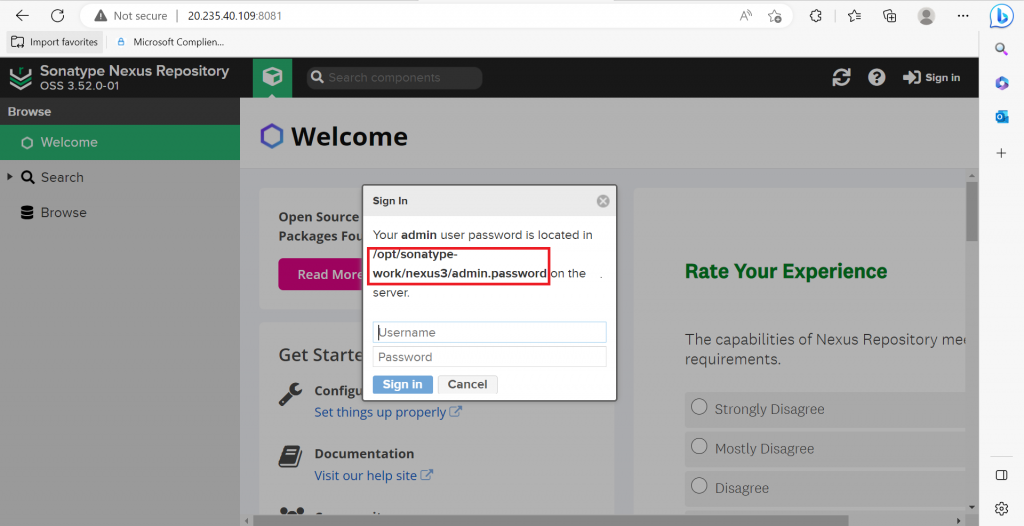
It will ask for Username and Password, Default Username is admin and to retrieve default password copy above highlighted path and run using below command :
sudo cat /opt/nexus/sonatype-work/nexus3/admin.passwordYou will be see the default password, Copy the default nexus password and paste in the password field and click on Sign-in button, You can reset the password once logged in to nexus.
Now you may see the next screen as below :
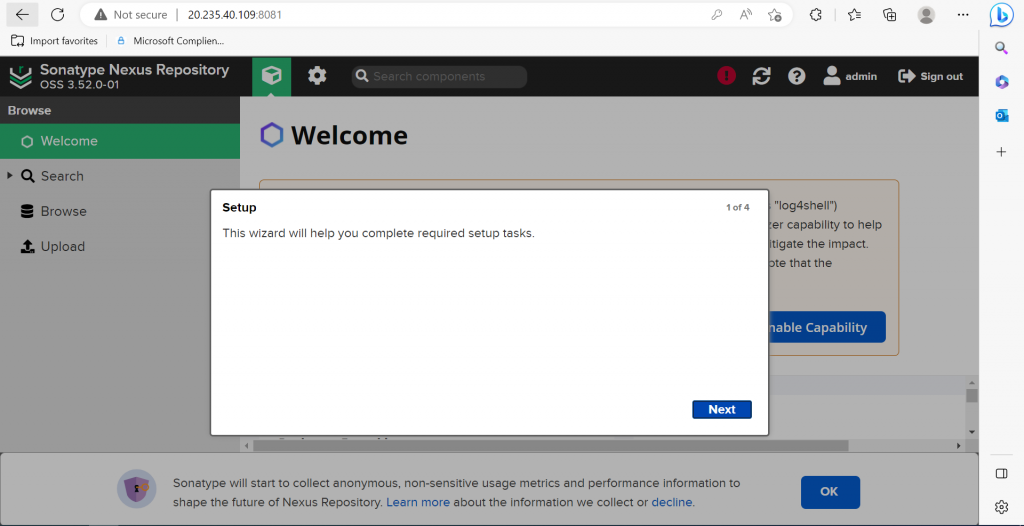
Click on Next button and you may see the next screen as below :
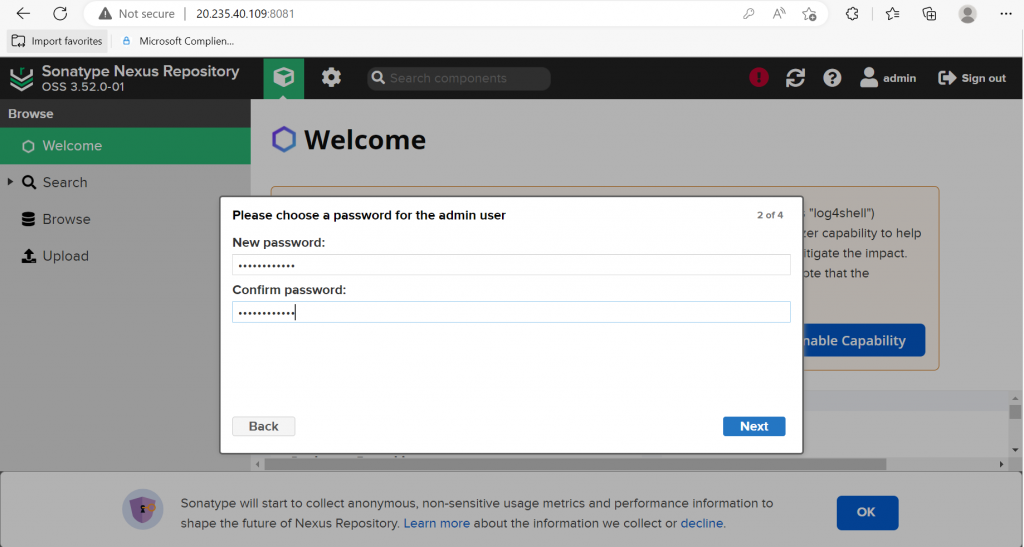
Now you can set your own password for further use, Keep a note of your Password and default username will be admin
After entering your Password click on Next and you may see the next screen as below :
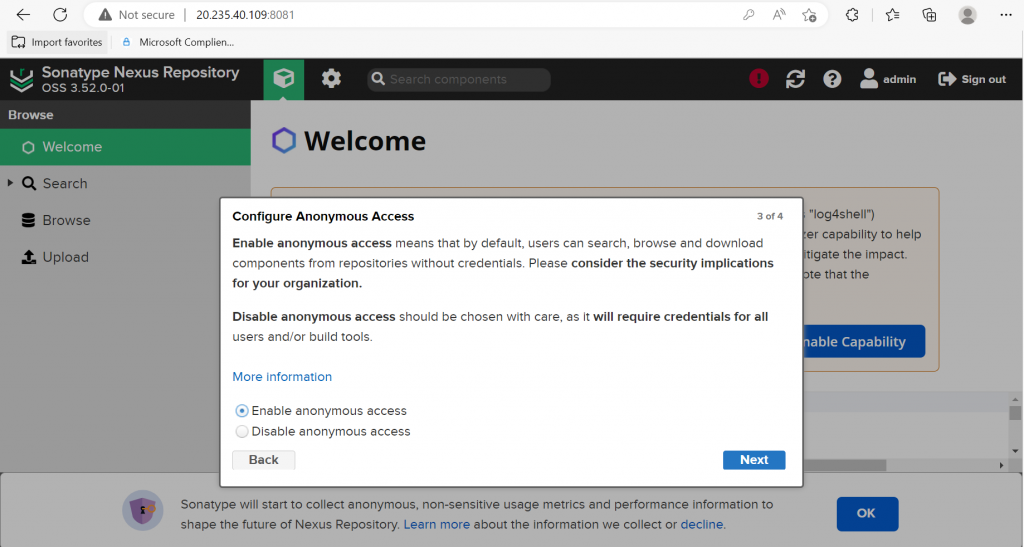
Now we will continue with the default selection as Enable anonymous access and click on Next button and you may see next screen as below :
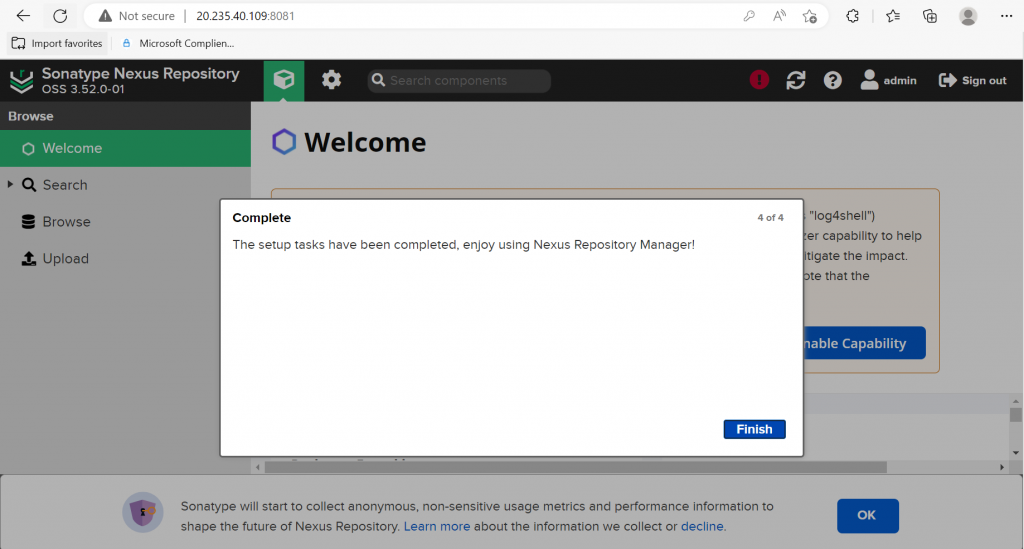
Now it will show the final page where It’s saying Installation is completed, Now click on Finish button and you will see final dashboard of Nexus service as shown below :
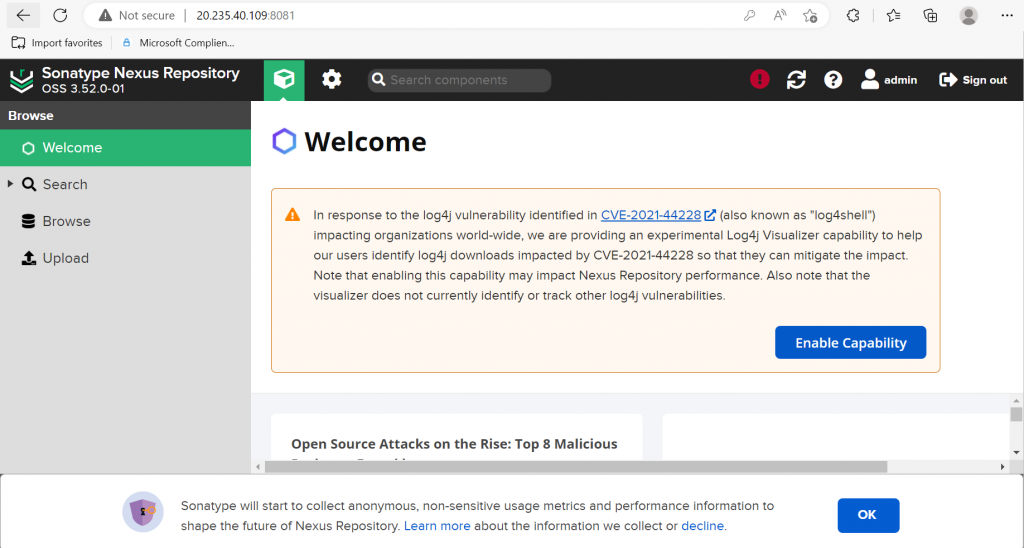
Woohoo !!.. We have successfully installed and configured Nexus Service.
Conclusion
Congratulations! You have successfully installed and configured Nexus Repository Manager on your Ubuntu server. You can now use it to manage your software artifacts and streamline your development and DevOps workflows.
If you face any difficulty or error while following above steps, Please write in comment section.


Thanks for the help, This blog is explaining in detail with every steps. Thanks again
Your ability to distill complexity into actionable knowledge is unparalleled. Thank you for this gem!
I appreciate how well-researched and thorough this article is. It’s a benchmark for quality content!
thanks for your help
You’ve turned a daunting subject into something approachable and even fun to learn!
I was facing error while following other website post but now i have done it successfully with the help of this blog. thanks
Detailed Explanation. Thanks
Thanks for this Post.
Outstanding, My all errors resolved.
Thanks a million for this blog.
The attention to detail in this blog is truly commendable. Thank you for sharing your expertise!
I look forward to more articles from you. Your work is a true asset to the community!
This blog is a testament to the power of sharing knowledge. You’re empowering others!
I’m definitely sharing this with my team. They’ll find it as valuable as I did!
This blog feels like a mentor guiding me through the blog. Immensely grateful!
Your work is making a real difference in the community. Thank you for sharing your knowledge!
I can’t thank you enough for this. It’s rare to find content that’s both in-depth and accessible.
Your blog has saved me hours of research. I truly appreciate the effort!
This article is a testament to your expertise. Every detail is meticulously covered!
Learned more from this post than an entire course.
You nailed the explanation. So well-articulated.
You’re helping a lot of people—keep going!
This bridges the gap between theory and practice.
The memory management tips were spot on.
This answered a question I’ve had for ages.
You just helped me debug a weeks-old issue.
Loved the code walkthrough. Clean and readable!
Perfect timing, I was just working on this.
You’ve made this much easier to understand.
Excellent breakdown of a complex topic!